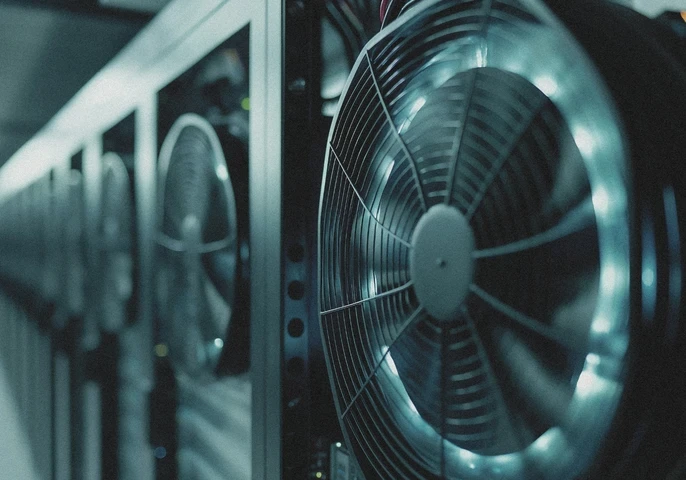
If you have ever used an electronic device — such as a laptop or desktop computer — you’ll know that these devices can sometimes run very warm. If the internal temperature reaches too high, you run the risk of overheating and damaging components like central processing units (CPUs), graphics processing units (GPUs) and power supplies. This is where cooling systems come into play.
Without proper temperature control, performance of these components can slow down, wear out, and become irreparably damaged. One solution for this is liquid cooling.
Unlike traditional air-based cooling systems, which rely on fans and heatsinks, liquid cooling systems are a quieter and more efficient way to manage internal temperatures. In this guide, we’ll go into detail about how it works, the benefits and drawbacks of such systems, and discuss when it’s the right choice.

What is Liquid Cooling?
The basis of liquid cooling is that it’s a method of transferring and removing heat from the components within the device. A liquid coolant is used to absorb the heat from the source which is heating up (whether a CPU or GPU) and move it towards a radiator, where it’s cooled down before being recirculated around the device.
This follows thermodynamic principles, such as convection and conduction, which states that liquids move heat more efficiently than air. This allows for a much faster and more effective cooling effect than if you were to use fans and air.
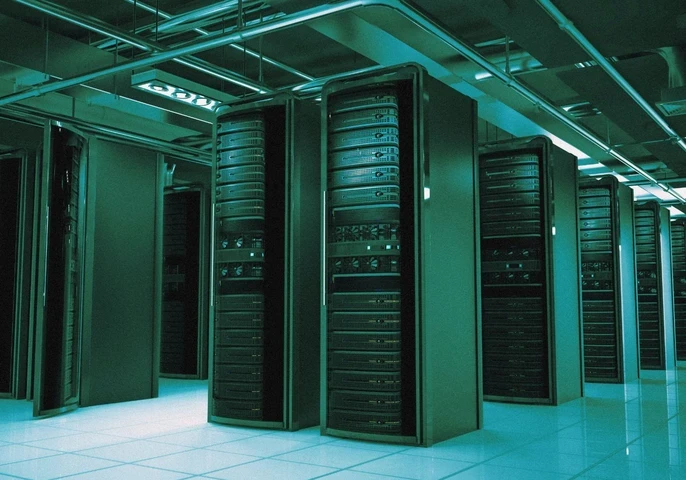
Liquid cooling can be used for specific devices or as part of a wider set up in something like a data center. This method of cooling is ideal for these types of large setups, thanks to the speed at which liquid cooling works. Data centers are prone to overheating, due to the large number of devices all working simultaneously — often completing large, complex tasks that require large CPUs.
How Does Liquid Cooling Work?
Now we know the basics of what liquid cooling is, we can delve deeper into how it works. A standard liquid cooling loop includes a few key components:
1. Water block
A water block is directly attached to the component that’s producing the heat. The block acts in a similar way to a heatsink. A metal base, which is usually made from copper or nickel-plated copper, is in direct contact with the chip.
Inside the water block is coolant, which flows through a channel system to constantly absorb the heat.
2. Pump
The pump is used to circulate coolant around the loop — essentially acting as the ‘heart’ of the system. It ensures that liquid coolant moves continuously and consistently from the block, to the radiator, and back again.
3. Radiator
Perhaps the most important part of the liquid cooling system, the radiator is where the heat is actually cooled down. The heated coolant is pumped towards the radiator where it’s cooled down by fans.
As the air passes over the radiator, it moves the heat away from the liquid coolant.

Why 6G Is Really About Systems
Argues 6G’s value lies in intelligent, resilient infrastructure that can carry AI, sensing and automation, not just faster mobile speeds.
4. Reservoir
This is an optional yet common aspect of the liquid cooling system. The reservoir holds additional coolant, making it easier to fill, bleed, and maintain the loop.
5. Tubing
The tubing is what connects all the components of the loop. It can appear in a variety of materials, including PVC, silicone, hard acrylic, PETG, and others. Fittings are another essential part, and are what secures the tubing to each other, creating a leak-proof seal.

Types of Liquid Cooling Systems
When implementing liquid cooling systems, there are two types you can consider using:
-
All-in-One (AIO) liquid coolers
These are pre-assembled, sealed units which don’t require any form of setup. It includes everything required to start liquid cooling — such as the pump, water block, radiator, and tubing.
Because of this, it’s relatively easy to install yourself, and is typically seen as a low maintenance option for your devices. This means it’s an ideal option for beginners or those who want the cool factor without any complexity.
-
Custom (AKA 'Open-Loop') liquid cooling
As the name suggests, this is a custom-built cooling system. Due to their custom nature, these systems offer a premium cooling performance, as well as visual customisation, from coloured coolant to RGB lighting.
Because these are custom built systems, they are also able to cool multiple components in a single loop, depending on how you’ve built it. While this option does give you more control, it does require more planning, installation time, and general maintenance.
Net-Zero Test for AI Data Hubs
AI data centers become a climate target as UN scrutiny turns energy, water and land efficiency into core infrastructure constraints.

Liquid Cooling System Benefits
1. Superior thermal performance
The heat capacity of liquid is much higher than that of air. This allows it to absorb and transport more heat in comparison to an air cooling system, resulting in lower operating temperatures for each component that needs cooling.
This is essential for high performance tasks, such as gaming, video rendering, or scientific computing.
2. Quieter operation
Liquid cooling is much more efficient than its counterpart cooling systems, and so the fans required to remove the heat don’t need to work as hard. This means that the overall system is much quieter — in some cases, almost silent.
3. Aesthetically pleasing
If you’re so inclined, you could take the time to ensure that your custom liquid cooling loop looks exactly how you’d like it. A transparent case on your device can really show off your style. Depending on the colour of the coolant, whether you add lighting, or sleek, hard tubing, your cooling system may well be the visual appeal of your device.

When Capacity Planning Fails
Fragmented monitoring leaves stranded power, higher outage risk and rising costs as AI-era workloads stress legacy facilities.
4. Efficiency with space
Depending on how you organise each element of the liquid cooling loop, you could free up space around each component of your device that requires cooling. Playing around with the setup could ensure that you end up with a compact device, rather than a clunky piece of equipment.

Liquid Cooling System Drawbacks
1. Risk of leaks
As the system is liquid based, there is the possibility that it will leak. Even though the loop is completely sealed and, in general, very safe, custom loops must be assembled carefully to mitigate any chances of a leak.
2. Complex installation
A custom-built liquid cooling system requires careful measuring, cutting, and assembling each element. And with it being liquid based and so close to electrical equipment, you need to be very careful to ensure that it doesn’t spill. Any mistakes or accidents could wind up being very costly!
3. Maintenance responsibilities
You’ll want to focus on maintenance for your liquid cooling loop to ensure that it’s performing well. Coolant typically should be replaced every 6-12 months, depending on the size of the device and loop. You also want to ensure that all the fittings stay tight, to avoid any chances of leaks.
Due to the liquid element, you’ll also need to check for any signs of algae growing in the loop, replacing this as necessary when it starts to build up.
When AI Overloads the Grid
Why boardrooms must treat AI data centre power demand as a core constraint on growth, and which providers are engineering for efficiency.

4. Financial considerations
In comparison to other cooling methods, like air cooling, liquid cooling is more expensive — and custom loop setups are even more so. The more intricate the cooling loop, the pricier it will be, even going up to $1,000.
When to Use Liquid Cooling
There are a few times when you might want to consider applying liquid cooling to your devices — and a few times when it’s not so practical to. Liquid cooling is best suitable if:
- You’re running a data center
- You have a high-end gaming PCs
- Your computer is running multiple applications for long periods of time
- You’re overclocking your CPU/GPU
- You want a silent/quiet set up
- You’re looking for a setup that matches your aesthetic
- You have limited airflow options


Comments ( 0 )